|
| |
|
    
Incubation
|
The 10 steps
described below are general instructions good for incubating just about all
reptiles. |
|
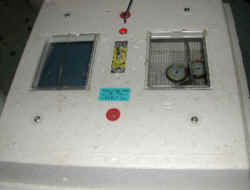
1.) There are
many sites that have neat methods of hand making an incubator, but I am
not that mechanically inclined, so I stick with the good tried and true
Hovobator. One big or two small picture windows is fine (I prefer the two
smaller as more insulation is provided). Do not get the model with the turbo fan
- those fans are great for bird eggs, but will dry out reptile eggs. Unlike bird
eggs, reptile eggs should never be turned or the fetus will drown in the fluids.
|
|
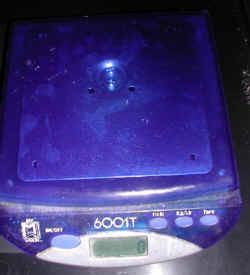
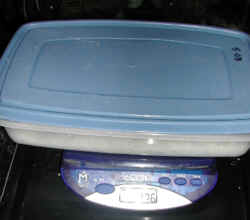
2.) For a scale I
chose the My Weigh 6001T model. It weighs up to 1000 grams, so is perfect for
weighing small geckos as well as large Beardies. I have found it to be
incredibly accurate.
|
|
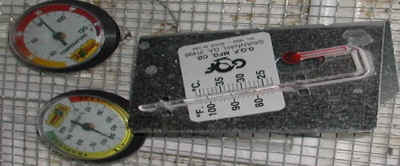
3.) You will need
to have in your incubator a humidity gauge and a thermometer, you may use a
digital thermometer if desired. In Leos if you keep the incubator at 78*f - 82*f
you will hatch out females - If you keep the temps at 88*f - 90*f, you will
hatch out males, temps in between result in a mixed clutch. Males roast faster
and will hatch out first, but since they tend to be harder to sell, most people
incubate for females. The Hovobator provides a water reservoir at the bottom of
the unit if you choose to use it. I do not.
|
|
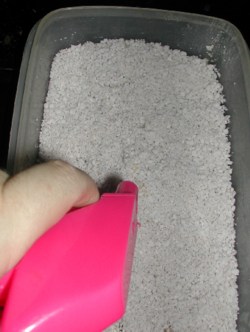
4.) When
preparing your container for eggs, weigh container by itself (lid off) and then
"tare" so the scale reads "0"g. (If you do not have a tare
button you must subtract this weight from the weight measurements you are
taking). Then fill container half up with a substrate the holds moisture nicely.
I use Perlite - a white styrofoam looking substrate that can be purchased at
Wal-Mart or most home improvement stores.
|
|
5.) Then mist the
substrate from the top to the bottom in equal proportion until the weight is
nearly double (remember not to include the weight of the container if you don't
have a tare button!).
|
|
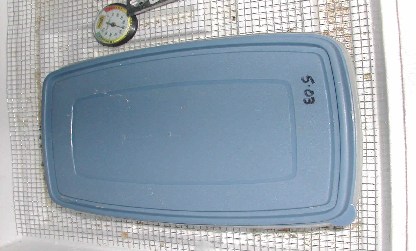
6.) Notice in the
pic below that the container has no air holes. I prefer this to air holes
because it keep the humidity constant. However, there is a downside to this
method. If you are not diligent with your dates and peer into the container
daily near those date times, you could end up with babies that hatch, use up all
the air, and perish. That has happened to me once. It was a hard lesson to
learn. I wrote on the container to date when the eggs were laid, but it makes
better sense to use a piece of masking tape to mark on instead. :o)
|
|
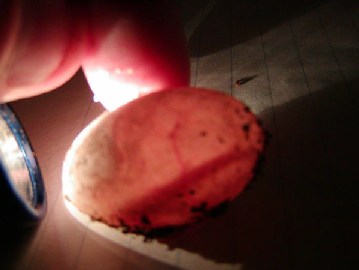
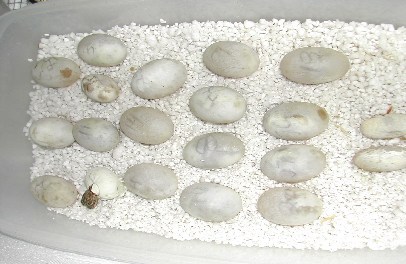
7.) Each
container approximately 5"X8" can hold 5 rows of 4 eggs each, or about
20 eggs. Below you can see I do not have that many in this container. Mark each
egg on the face up side so that you make sure to keep in the same position as
when it was laid so the embryo doesn't drown. Eggs should feel like firm
marshmallows with a nice white (or pinkish early on) coloration. If you hold a
small flashlight or penlight to the egg's side you will see pink veins running
through it after the week or so if it is viable. If an embryo dies or an egg is
not fertile it will turn a dingy yellowish color w/ discolorations and begin to
mold.
*This pic is from
Chris Allen - I will replace it with my own asap
|
|
8.) Below you
will notice that the top eggs have molded. They are very very chunky hard - I
know they are not viable any longer - but I wiped the mold off and will continue
to incubate them until they begin to smell, just in case. The three middle eggs
have gone squishy like a water balloon - note the discoloration. The bottom left
egg is still viable, however, the tiny egg is not (it is tiny because it is a
Crested Gecko egg). If I suspect an egg has gone bad, I will gently rearrange
the eggs to keep all the eggs I think are bad together so that mold doesn't
spread too far if they begin to molder. Now that I am getting more breeders I
will mark each egg with a number (for mother) and a letter (for father) (I
always intend to have more females breeders than males - that is why I chose
that method).

|
|
9.) Eggs
will darken some right before hatching due to the cramped environment within the
egg, some even begin to sweat, so don't panic. The two eggs at the right side
are Leo eggs, the others are Beardie eggs. An egg tooth on the baby's mouth will
slit the egg - it may take some time to come out after the initial slitting.
Many people (and I am one of these) help a struggling baby out of the egg, but
keep in mind if they can't make it out of the egg, they are probably not capable
of surviving on their own. Many babies will still have the yolk sack still
attached - just leave them be or place them on damp paper towels until the
sack is absorbed or falls off. Babies may not eat for the first 5-7 days
while they are digesting the yolk sac they have absorbed. Then feed
appropriately sized prey no larger than the space between their eyeballs.
|
|
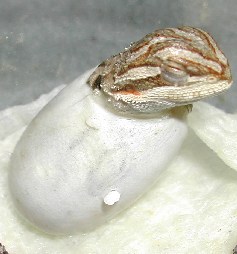
10.) As seen below,
if I catch them hatching, I will move them onto damp paper toweling because the
poor dears get covered in Perlite when they come out all wet and sticky.
Boy, it sure is
hard work hatching!
|
|
|
|
|
|
| |
|